
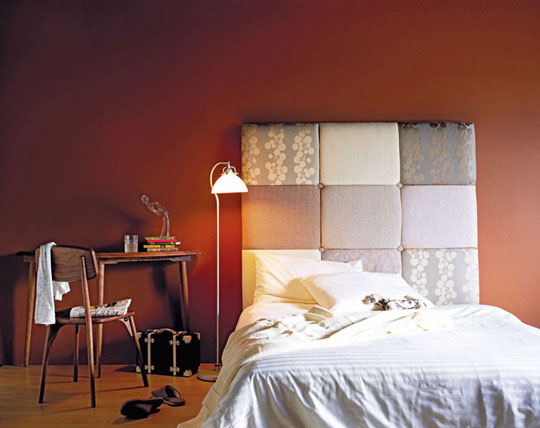
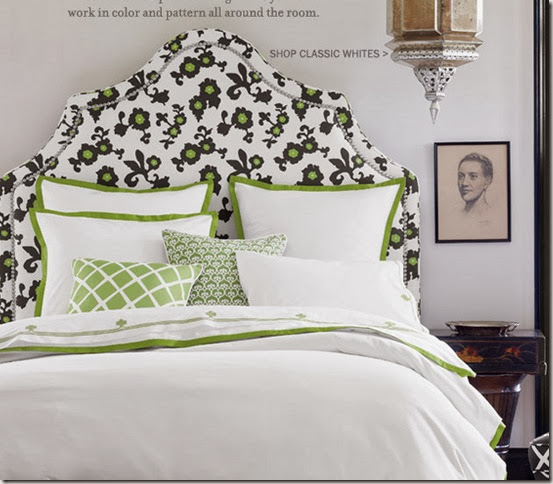
A headboard is not only a practicle aspect of every room but also a decor essential. You can play with headboards to create a certain ambiance in a room be it a sophisticated master bedroom, a cute little girls room or a masculine bachelor pad. It is your personal touch to a bedroom. You get to choose your own fabrics, plain, colourfull or even textured- the limits are endless. Once you have mastered the upholstered headboard feel free to experiment with different materials such as mirrors, tiles, wood or simply create a headboard using some photoframes or blackboard paint. Be creative and don't be scared, it is your personal style and {sparkle} that must will become the focal point of the room.
Materials:
*Tape measure *Staple gun
*Paper for pattern *Cording/Braid (whatever trimming you prefer)
* Plywood
*Saw
*Sandpaper
*Upholstery foam
*Batting
*Muslin (sheeting)
*Decorative Fabric
*Electric Drill
*Screws
Step1: Measure your bed and decide on how wide and tall you would like the headboard. This varies with each headboard as people have different concepts. You can have a medium sized headboard or even an entire walled headboard. Generally the headboard is the same size or slightly wider than the width of the matress. When it come to height, about 8 inches of the headboard should be visible above the pillows leaning against it.
Step 2: Use the paper to experiment with different headboard shapes. This serves as your stencil. It could be a plain square or round or even abstract. Once again this is your personal preference.
Step 3: Mark the wood to the size needed and trace around the stencil you have made in step 2. Now cut the headboard shape out of plywood with a power saw. Depending on the size of the headboard you may need to cut legs to raize the headboard off the floor.
Step 4: Lightly sand around the outer edges of the plywood with a medium-grit sandpaper. Cut a sheet of upholstery foam to the size of the wood leaving an extra inch all around. Lay the foam over the frame and tack it in three or four places with a staple gun to secure it. This could also be done with a strong spray adhesive.
Step 5: Cover the layer of foam with a sheet of upholstery batting. Cut 2 to 4 inches larger than the size of the wood. Now tack the batting to the back of the frame using staples, ensure that the top and side edges look smooth and even from the front.
Step 6: Cut a piece of plain white sheeting to 4 to 6 inches larger than the headboard shape and staple the sheeting to the back of the wood. Be very careful and smooth the corners evenly.
Step 7: Iron the outer layer of decorative fabric you have chosen and smooth it face down on the work area. Set the covered headboard face down on top of it. Cut the fabric the same size and shape, remember to leave about 4'' extra to wrap around the back of the headboard.
Step 8: Start at the center top and begin to staple the fabric to the back, make sure that any pattern on the fabric is properly centered and straight. Pull the fabric just enough to get a smooth front side but not too much as this will cause the fabric to pucker.
Step 9: Once you have completed about 12'' of the top switch to the bottom. Smooth the fabric around the headboard and staple several places on the bottom edge. Continue working in different sections all along the top and bottom. Lift up the headboard and check your progress.
Step 10: If you are happy with the project set it down and begin to secure the fabric to the sides folding the outer sides and stapling the fabric to the back. Make sure the corners (if you have any) look neat and tidy from the front.
Step 11: If you want you can staple a plain lining fabric to the back of the headboard to cover all the raw edges of the fabric, batting and foam.
Step 12: Attaching the legs. If you would like your headboard to have legs set the headboard in place. You may want to lean the headboard against the wall and between the matress to stabilize it. You drill holes in the legs and attach them to the frame of the bed. Some people prefer to attach the headboard direclty to the wall.
Step 13: If you want you can trim the top edge of the headboard with cording or ribbon.
Tips: If you are not sure what size or shape to make, buy a roll of craft paper and cut out several shapes, tape them to the wall to see what looks best. Match the headboard fabric to another fabric in the room. Remember this is your own personal touch so do what your heart desires***
 4.
4.

 6.
6.
Step 6: Cut a piece of plain white sheeting to 4 to 6 inches larger than the headboard shape and staple the sheeting to the back of the wood. Be very careful and smooth the corners evenly.
Step 7: Iron the outer layer of decorative fabric you have chosen and smooth it face down on the work area. Set the covered headboard face down on top of it. Cut the fabric the same size and shape, remember to leave about 4'' extra to wrap around the back of the headboard.
Step 8: Start at the center top and begin to staple the fabric to the back, make sure that any pattern on the fabric is properly centered and straight. Pull the fabric just enough to get a smooth front side but not too much as this will cause the fabric to pucker.
Step 9: Once you have completed about 12'' of the top switch to the bottom. Smooth the fabric around the headboard and staple several places on the bottom edge. Continue working in different sections all along the top and bottom. Lift up the headboard and check your progress.
Step 10: If you are happy with the project set it down and begin to secure the fabric to the sides folding the outer sides and stapling the fabric to the back. Make sure the corners (if you have any) look neat and tidy from the front.
Step 11: If you want you can staple a plain lining fabric to the back of the headboard to cover all the raw edges of the fabric, batting and foam.
Step 12: Attaching the legs. If you would like your headboard to have legs set the headboard in place. You may want to lean the headboard against the wall and between the matress to stabilize it. You drill holes in the legs and attach them to the frame of the bed. Some people prefer to attach the headboard direclty to the wall.
Step 13: If you want you can trim the top edge of the headboard with cording or ribbon.
Tips: If you are not sure what size or shape to make, buy a roll of craft paper and cut out several shapes, tape them to the wall to see what looks best. Match the headboard fabric to another fabric in the room. Remember this is your own personal touch so do what your heart desires***
 | ||
| 2.
|
 4.
4.
5.
6.
7.
 8.
8.
9.
 10.
10.
11.
8.9.

 10.
10.11.
Pictures: 1. {allaboutyou.com} 2&5. {h2hblog.com} 3. {chattafabulous.blogspot.com} 4. {centrepiecefurnishing.wordpress.com} 6. {us.mydeco.com} 7. {verbenanestedtreasures.blogspot.com} 8&9&10. {decorhappy.blogspot.com} 11. {lovinglivingsmall.blogspot.com}
No comments:
Post a Comment